

If you have ever looked at a rough patch of dirt and thought, “Yep, that will become a driveway somehow,” you already know the first rule of the job: the real work starts before the surface goes down. Driveway site preparation decides whether your new driveway feels sharp, solid, and easy to live with, or turns into a bumpy little regret after the first decent rain.
I treat driveway site preparation like the quiet hero of the whole project. Nobody throws a party for a well-compacted base, but everyone notices when a driveway cracks, dips, or holds water like a shallow pool after a storm. In Wide Bay, where weather can swing from sunny to sloppy in no time, that foundation matters even more.
For a deeper look at the hands-on side of the job, read this Reliable driveway site preparation Service in Wide Bay. It matches the same practical mindset I bring to every residential project.
Why driveway site preparation matters
A driveway looks simple from the street, but the base underneath carries the real pressure. I always start with the ground because I know the finish only looks good when the prep work does its job.
When I prepare a site properly, I reduce the chance of soft spots, water pooling, edge break-up, and that annoying ripple effect that shows up after a few months. Good driveway site preparation also makes the whole build smoother for everyone else on site. Less rework, less stress, fewer “we should have checked that earlier” moments.
Step 1: Look at the site with fresh eyes
Before I bring in machinery, I walk the site and study how it behaves. I look for slope, low points, old fill, trees, buried services, and access points. I also ask one simple question: where will the water go when the rain hits?
I do not rush this stage, because rushed driveway site preparation usually comes back with muddy boots and a grudge. If the block sits on a slope, I plan the levels early. If the soil looks soft, I take that seriously. If access feels tight, I map the machine movement before I dig a single scoop.
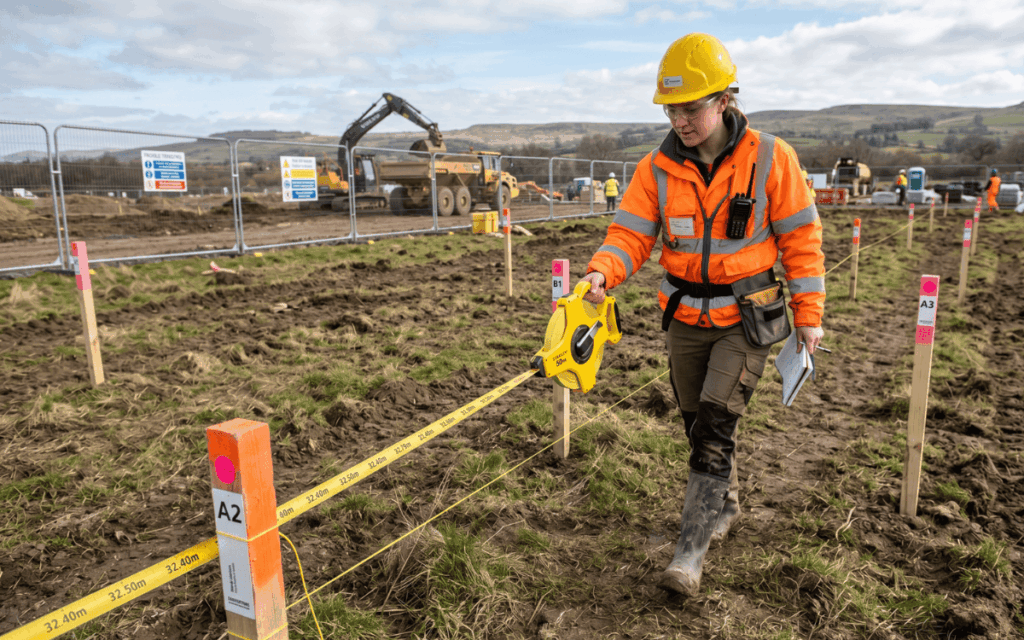
Step 2: Mark the layout properly
Once I understand the site, I mark the driveway line, width, turning space, and tie-in points. This is where a lot of jobs either look neat or start drifting off course.
I use pegs, string line, and clear measurements so I can see the shape before I move dirt. That way, I can check the driveway works for daily parking, bins, visitors, and the occasional awkward reverse park after a long day. Good planning now saves headaches later.
Step 3: Clear, strip, and shape the ground
After the layout looks right, I clear the area. That means removing grass, loose material, topsoil, roots, old rubble, and anything else that does not belong under a driveway. I want a clean working surface before I build up the base.
Then I shape the ground so the finished driveway will drain the right way. I never leave drainage to luck. Water always finds a path, and if I do not guide it, it will make one on its own.
Step 4: Check the soil and deal with weak spots
This step can save the whole project. Some soils hold firm and behave beautifully. Others look fine on top but turn soft once they get wet. That is where solid driveway site preparation earns its keep.
If I find soft patches, I cut them out and replace them with suitable fill. If the site needs extra support, I build the base in layers and compact each layer properly. I do not gamble with weak ground, because weak ground always wins in the end.
Step 5: Plan drainage before the surface goes down
A driveway without drainage is just a polite way to invite trouble. I always think about how runoff will move across and away from the driveway, especially on residential blocks where the home, garden, and boundary lines sit close together.
| Stage | What I check | Why it matters |
| Layout | Width, slope, access | Keeps the driveway practical |
| Clearing | Soil, roots, debris | Gives me a stable working base |
| Drainage | Falls, runoff, low points | Helps stop pooling and erosion |
| Base build | Fill, layers, compaction | Supports the final surface |
| Finish prep | Edges, levels, transition points | Gives the driveway a neat look |
I also think about where stormwater will move during heavy rain. In Wide Bay, that is not a “nice to have” detail. It sits right at the centre of a durable driveway site preparation plan.
Step 6: Keep the local rules in mind
I always check local rules before the job moves too far, especially when the driveway crosses the verge, footpath, or road reserve. It keeps the project clean, compliant, and far less likely to hit a nasty surprise halfway through.
The Fraser Coast Regional Council vehicle crossover fact sheet is a handy place to start because it explains crossover responsibilities, permits, and the need to keep drainage and services in mind.
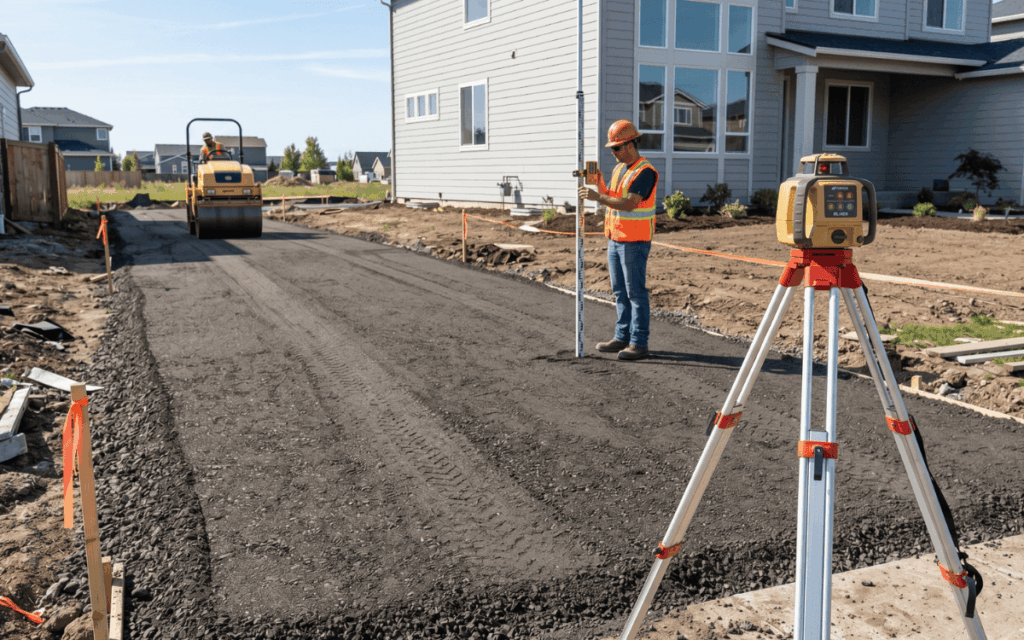
Step 7: Build the base in layers
This is where the driveway starts to feel real. I place the selected fill or sub-base in layers, then compact each layer before I add the next one. That layered approach gives the driveway strength from the bottom up.
I never treat compaction like a box-ticking exercise. I want the base to feel solid underfoot and under machinery, because a loose base will settle later and spoil the finish. A proper driveway site preparation process makes the final surface look better and last longer.
Step 8: Protect the edges and tie-ins
Edges matter more than most people think. If I leave the sides weak, the driveway can crumble where tyres meet the edge. If I handle the tie-ins badly, the driveway can feel awkward at the garage, footpath, or street entry.
I pay attention to transitions because neat edges make the whole project look finished rather than half-done. And let us be honest, a tidy driveway has a certain “grown-up house” energy that everyone secretly wants.
Step 9: Recheck the levels before the final surface
Before I hand over the site for the final surface, I recheck everything. I confirm the falls, the access points, the edge lines, and the drainage path. I also look for soft spots, low corners, and any last-minute corrections.
This final check protects the whole job. It is much easier to fix a level issue now than after the surface goes in. Good driveway site preparation gives you a smooth build, but great preparation gives you peace of mind.
Common mistakes I avoid on residential driveway jobs
I see the same problems over and over: skipping soft spots, ignoring drainage, rushing compaction, and guessing the levels instead of checking them. None of those choices ages well.
I also avoid building over unsuitable material just to save time. That move can look clever for about five minutes, then it starts cracking the budget. In my experience, the best driveway site preparation always respects the ground, the water, and the way the property actually works.
What a good prepared driveway gives you
When I finish the preparation stage properly, the rest of the job feels cleaner and more predictable. The surface sits straighter. The drainage works better. The driveway looks sharper from day one, and it keeps that look for longer.
That is the real value of driveway site preparation. It is not just about making space for a driveway. It is about building a stable base for everyday life — the school run, the weekend groceries, the tradie ute, the delivery van, and all the little comings and goings that make a home feel alive.
Conclusion
If you want a driveway that looks sharp and performs well, start with the ground and respect every step. I always say the best driveway is the one that does its job quietly, season after season, without drama. That only happens when driveway site preparation gets the attention it deserves.
Take the time to plan the layout, clear the site properly, handle drainage with care, and compact the base the right way. Do that, and you give your residential project the strong start it needs.
Ready to get your driveway project moving in the right direction? Talk to a local specialist who knows Wide Bay conditions and can help you turn a rough block into a driveway that feels solid, clean, and built to last.
Frequently Asked Questions
How long does driveway site preparation usually take?
It depends on the size of the block, the soil, the slope, and how much clearing the site needs. A simple job moves quickly, while a more complex site takes longer because I have to get the levels and drainage right.
Do I need drainage under a residential driveway?
In most cases, yes, I plan for drainage in some form. Water always needs a path, and good drainage helps protect the driveway structure and the surrounding yard.
Can I prepare the driveway site myself?
You can handle some planning and clearing, but I recommend professional help for excavation, compaction, and level setting. Those steps decide how the driveway performs later.
What is the most common mistake people make?
They rush the base. I see a lot of people focus on the final surface and forget that the foundation carries the real load.
Why does soil type matter so much?
Because different soils behave differently when they get wet, dry out, or carry weight. A soil that looks fine today can cause movement later if I do not prepare it properly.
How do I know if my driveway is ready for the next stage?
I check the levels, the compaction, the edge lines, and the drainage fall. If the base feels solid and the shape looks right, I know I have done the groundwork properly.