
You know that smooth driveway or tidy garden path that looks effortless from the street? There is usually a fair bit of sweat, soil, and smart planning hiding underneath it. Excavation for driveways & pathways is where the good work starts.
Get that part right, and everything that sits on top feels solid, neat, and built to last. Get it wrong, and you are left with puddles, cracks, soft spots, and a headache you did not need.
For homeowners and property managers in Wide Bay, this step matters even more. Between heavy rain, sandy patches, clay pockets, and the odd stubborn root system, the ground can behave like it has a personality of its own. So if you are planning a new driveway, a side path, or a stylish front entry, I will walk you through the whole process in plain English.
If you are looking for help with excavation for driveways & pathways in Wide Bay, start with a team that understands local soil, access, drainage, and finish quality from day one.
Why excavation matters more than most people think
A driveway or pathway is only as strong as the ground beneath it. I have seen plenty of projects where the top layer looked great on day one, then started sinking, cracking, or washing out after a few storms. That usually happens because someone rushed the preparation.
When I plan excavation for driveways & pathways, I focus on three things first:
- a stable base
- correct slope for water runoff
- enough room for the right materials
That sounds simple, but the details make the difference. A path needs to sit level and drain cleanly. A driveway needs to carry vehicle weight without shifting. And both need proper excavation depth so the base layers can do their job.
Step 1: Start with a proper site check
Before any digging begins, I always want a clear picture of the site. That means looking at the slope, the soil, the access points, nearby trees, existing concrete, drainage lines, and where water likes to travel after rain.
You also need to think about:
- the finished height of the driveway or path
- how the new surface meets the house, garage, garden, or street
- whether the area needs retaining edges
- space for machinery to move safely
This is where a rushed job usually falls apart. Good excavation for driveways & pathways is never just “dig and hope.” It is a measured plan with a clean outcome in mind.
Step 2: Mark out the shape and depth
Once I know the site, I mark out the exact area. This part is boring in the best way possible. Straight lines, correct widths, and fixed levels save time later.
For driveways, you usually need a deeper cut than for pathways because cars and utes put much more pressure on the surface. Paths can often use a lighter excavation, but they still need enough depth for a solid base and tidy finish.
Here is a simple comparison:
| Area Type | Typical Goal | Excavation Focus | Main Risk If Done Poorly |
| Driveway | Support vehicle traffic | Strong base, compaction, drainage | Sinking, cracking, rutting |
| Pathway | Safe walking surface | Level finish, clean edges, drainage | Trip hazards, washout, uneven slabs |
| Shared entry | Looks neat and functions well | Balance of strength and appearance | Poor flow, patchy finish |
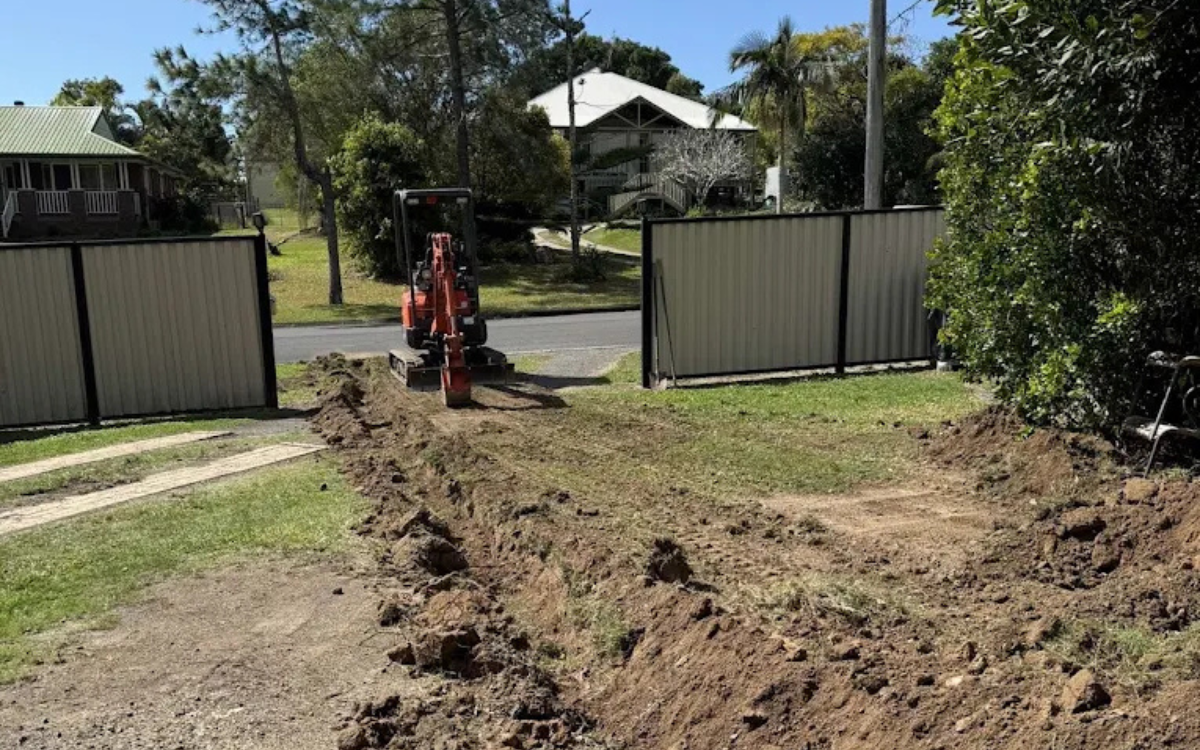
Step 3: Remove the top layer and any problem material
This is where the real digging begins. I remove grass, soil, loose fill, tree roots, old concrete, and any soft material that will not hold up over time. If the ground is unstable, I keep going until I reach a firmer layer.
A lot of people underestimate how much bad material sits just below the surface. It may look fine from the top, but once you clear it out, you often find surprises. Think soft soil, hidden rubble, old brick pieces, or moisture trapped in the wrong spot. Lovely little gifts from previous owners.
Step 4: Shape the ground for drainage
Water is the quiet troublemaker in driveway and pathway work. If it has nowhere to go, it will find its own way, and that usually means moving through your base layers, softening the ground, and causing damage.
That is why I build in the right fall or slope during excavation for driveways & pathways. The surface should guide water away from the house, garage, and any low spots where it can pool.
In Wide Bay, this matters even more because local weather can shift fast. One heavy downpour can reveal every weak point in a sloppy excavation job.
Step 5: Check underground services before you dig
This step is not optional. I always want underground services checked before excavation starts, because hitting a cable or pipe can turn a simple job into a costly emergency. The Queensland Electrical Safety Office reminds property owners to contact Before You Dig Australia and follow advice about underground electrical cables before excavation begins: Powerlines and underground cables.
That one step can save time, money, and a whole lot of stress. It also helps keep everyone on site safe.
Step 6: Build the right base
Once the excavation is complete, the next layer becomes the star of the show. The base gives the driveway or pathway its strength. I usually want a compacted, well-graded base material that locks together properly and supports the finished surface.
For excavation for driveways & pathways, this is especially important. If you want the surface to handle regular vehicle traffic, the base needs to be solid and even all the way through. For pathways, I still want a good base, but the focus shifts a little more toward levelness and clean finishing.
A quality base should:
- compact well
- drain properly
- stay stable over time
- suit the surface on top, whether that is concrete, pavers, gravel, or asphalt
Step 7: Choose the right finish for the job
Excavation is only half the story. The finish matters too.
Here are the common options I see most often:
- Concrete: durable, clean, and low maintenance
- Pavers: stylish, flexible, and easy to repair in sections
- Gravel: budget-friendly and quick to install, but needs more upkeep
- Asphalt: practical for driveways and faster to lay in some cases
The best choice depends on how you use the space, how much maintenance you want, and the look you are chasing. A front path should feel inviting. A driveway should feel tough and dependable. Ideally, it should do both without trying too hard.
Step 8: Factor in access, edges, and site conditions
Every site has its own drama. Some are wide open and easy to work with. Others have narrow access, steep sections, established gardens, or tight side entries where machinery needs to move like a careful dancer.
When I plan excavation for driveways & pathways, I also look at:
- edge support and retaining needs
- where spoil will go
- how trucks or machines will get in and out
- whether the site needs temporary protection for gardens or nearby structures
Small details here make a big difference later. Strong edges stop the finished surface from spreading or breaking down. Good access keeps the job efficient. And a tidy site usually means a better final result.
Step 9: Safety, local rules, and doing it properly
Excavation work is not the place to freestyle. A strong plan, safe setup, and proper equipment matter every time. Australian safety guidance treats excavation as construction work, and that means the work needs to be handled with care, especially when there are trenches, slopes, or underground services involved. If you want the official guidance, the Safe Work Australia model code is a useful place to start: Model Code of Practice: Excavation work.
That kind of guidance exists for a reason. A driveway or pathway might look like a small project, but the risks underneath can be serious if someone skips the basics.
Common mistakes I try to avoid
I have seen these errors cause more grief than almost anything else:
- digging too shallow
- ignoring drainage
- skipping compaction
- using poor quality base material
- failing to check underground services
- rushing the finish before the ground is ready
The funny part is that most of these mistakes do not show up immediately. They wait. Then a few weeks or months later, the surface starts moving, water starts pooling, and everyone suddenly becomes very interested in the word “repair.”
How to tell a good excavation job from a bad one
A solid job usually looks almost too neat before the final surface goes down. The levels make sense. The edges are clean. The base feels firm. Water flows away instead of sitting around like it owns the place.
A poor job often shows warning signs early:
- uneven cuts
- soft patches
- sloppy drainage
- visible debris in the base
- rough transitions at the edges
If you notice those things before the finish goes on, speak up. It is much easier to fix issues early than after concrete or pavers are locked in.
Why local experience matters in Wide Bay
Wide Bay has its own ground conditions, weather patterns, and property layouts. Some sites drain well. Others need extra care because of sandy runs, moisture, or mixed soil. Local experience helps because it teaches you how the land behaves, not just how it looks.
That is especially important for excavation for driveways & pathways. A driveway in this region needs to cope with heat, rain, and regular use. A pathway needs to stay clean, level, and safe through changing seasons. Local knowledge helps you plan for all of it instead of reacting later.
Conclusion
A great driveway or pathway does not start with the surface you see. It starts below ground, with smart excavation, proper drainage, a stable base, and a clear plan. When I approach excavation for driveways & pathways, I treat it like the foundation of the whole look and feel of the property.
If you want a result that looks sharp and lasts, do not rush the digging stage. Prepare the site properly, respect the ground, and choose the right finish for how you live.
Ready to get your project moving? Reach out to a local excavation team that understands Wide Bay conditions and can help you build a driveway or pathway that looks good and lasts the distance.
Frequently Asked Questions
How deep should excavation for driveways & pathways be?
The depth depends on the surface, soil type, drainage needs, and expected use. Driveways usually need deeper excavation than pathways because they carry vehicle weight.
Do I need drainage for a new driveway or pathway?
Yes. Good drainage helps stop pooling, erosion, and base failure. Even a small slope can make a big difference.
Can I excavate over old concrete or rubble?
Sometimes, but only if the existing material is stable and suitable. In many cases, I prefer to remove poor material so the new base has a better chance of lasting.
Why is compaction so important?
Compaction locks the base together and reduces movement. Without it, the surface can shift, crack, or sink over time.
Should I check underground services before excavation starts?
Absolutely. You should always check before digging to avoid damaging cables, pipes, or other hidden services.
What surface works best for driveways and pathways?
That depends on your budget, style, and maintenance preference. Concrete, pavers, gravel, and asphalt all have strengths, but the right base and excavation matter no matter which one you choose.
Can uneven ground affect the final result?
Yes, and quite a lot. Uneven ground can cause drainage issues, poor levels, and weak spots if the excavation does not correct it properly.
Is local soil in Wide Bay a factor?
Definitely. Soil type affects drainage, stability, and how much preparation the site needs before the final surface goes in.